

SMART™
Built for immediate implantation and immediate loading — the thread design condenses bone on insertion for high primary stability in compromised sites.
SMART™ implant is primarily designed for immediate and early loading protocols in compromised bones. By following a flexible surgical protocol adjusted to the bone type, ideal primary stability can be achieved. The blade-type apex and cutting edges enable axis readjustment for optimal restorative orientation and esthetic results.
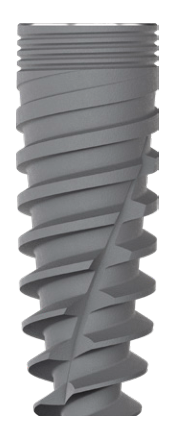
Design facts
Tapered root-like body
Ensures maximum bone-implant contact in a step-drilled osteotomy.
Back-tapered coronal part & micro-grooves
Preserves cortical bone, reduces stress on it, and promotes circular bone formation.
Apical cutting edge
Helps easy insertion in narrower osteotomies.
Combined thread
Gradually expands bone from sharper threads to ACME threads, securing stronger primary stability.
Double-helix thread
Increases primary stability and decreases micromovement.
Blade-like apex
Cutting edges at the tip facilitate realignment of the axis by self-tapping bone during insertion.
Specifications
| Diameter (mm) | Platform | Lengths available (mm) |
|---|---|---|
| 3.3 | NP | 8 · 10 · 11.5 · 13 · 16 |
| 3.75 | NP | 8 · 10 · 11.5 · 13 · 16 |
| 4.2 | RP | 8 · 10 · 11.5 · 13 · 16 |
| 4.7 | RP | 8 · 10 · 11.5 · 13 · 16 |
| 5.3 | RP | 8 · 10 · 11.5 · 13 · 16 |
Surgical protocol overview
Reference drilling sequence by bone density classification (Ø4.2 implant shown as example).
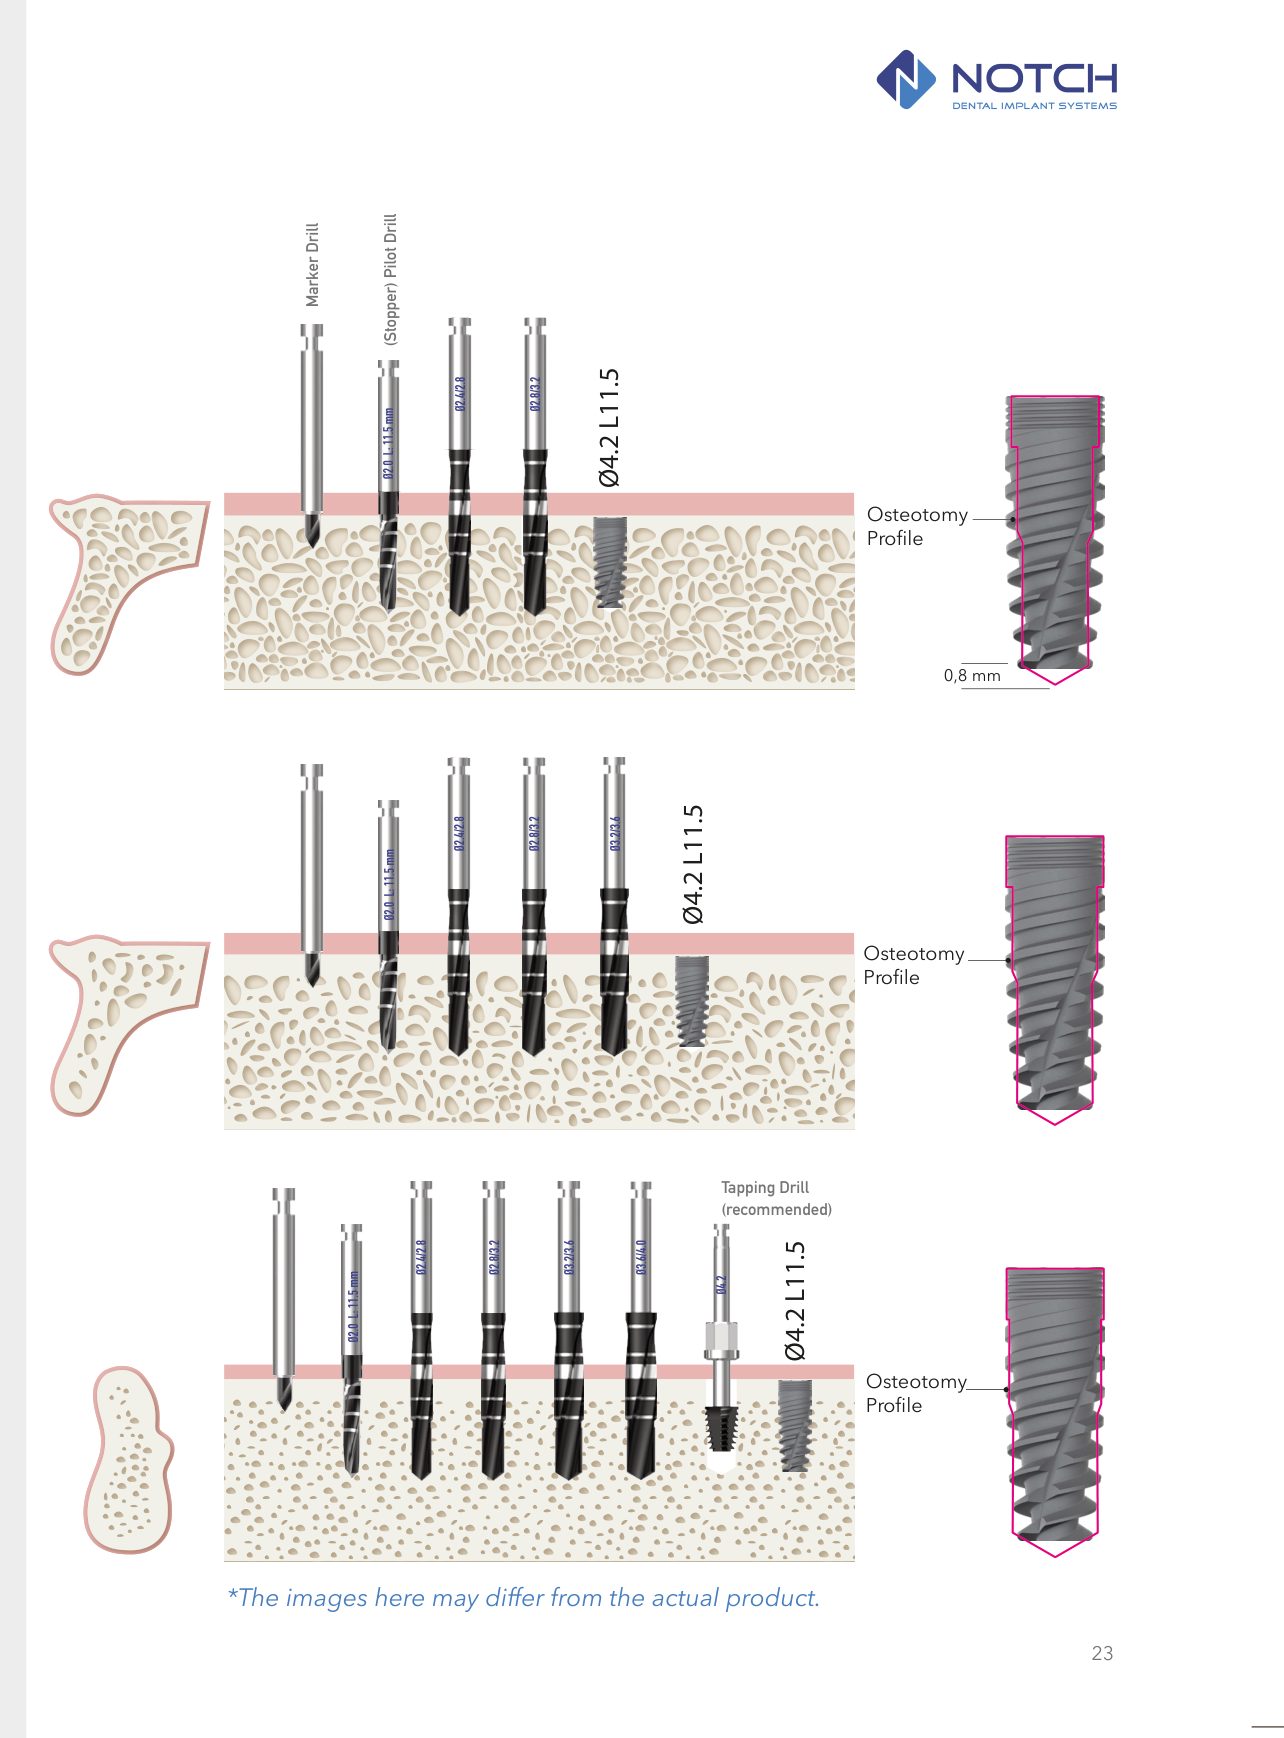
Drill to the 3.6–4.0 mm step drill and finish with the cortical drill. If insertion torque exceeds 70 Ncm, reverse the implant 1/2 turn and continue; if strong resistance is felt, widen the osteotomy one step further.
A 1-step narrower drilling protocol is recommended; the tapping drill is optional to break through cortical bone.
A 2-step narrower drilling protocol is recommended for a stronger apical grip; the tapping drill is optional. Place the implant 0.5 mm subcrestally.
Full step-by-step drilling sequences and torque guidance are provided in the official NOTCH® Instructions for Use accompanying every surgical kit.